PVC adhesive tiles can be laid in home, public, administrative and industrial premises, always observing the class of use. The material is not recommended for use in rooms with aggressive environments.
Laying is carried out in a heated room with an air humidity of not more than 60% and a temperature of at least 15 ° C, and preferably at least 20 ° C. Such parameters must be maintained 24 hours after installation. Drafts are excluded.
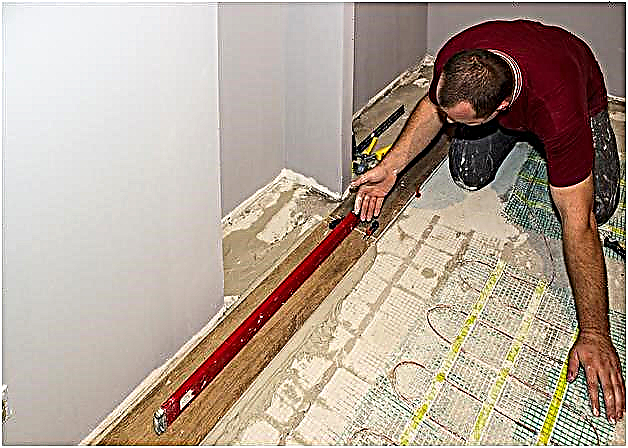
If a floor heating system is provided, then it is turned off 3-4 days before the start of work, and it is turned on only three days after its completion. The limitation on floor heating by the system is a maximum of 27 ° C.
Packages with PVC tiles are brought into the room and kept unopened for 24 hours if they were transported at temperatures above 0 ° C. When delivered in sub-zero temperatures, unopened boxes are kept in the room for 48 hours. 24 hours before the start of work, the boxes are opened, and the tiles are laid out on the floor for acclimatization.
Subfloor preparation
The base for laying PVC tiles must be smooth, durable, dry and clean in accordance with SNiP 2.03.13:
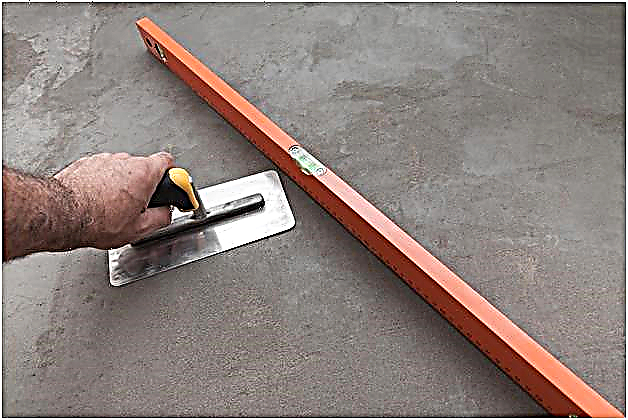
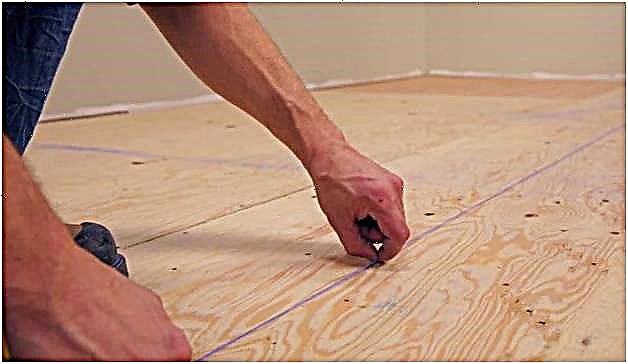
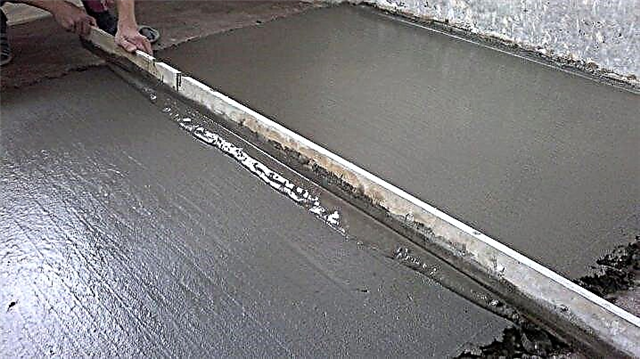
1. Leveling is done with leveling mixes or plywood. All irregularities are eliminated and the deviation of the surface from the plane is checked. For this, measurements are made with a 2-meter rule in all directions. Deviation should not be more than 2 mm by 2 m. It is recommended to lay plywood with a thickness of at least 8 mm in two layers in a cross way.
2. The strength of the base is allowed at least 15 MPa, so less durable chipboard, OSB, GVL, TsSP, etc. are not suitable for leveling. It is not recommended to lay PVC adhesive tiles on old coatings.
3. The moisture content of the leveling layer should not exceed 2%, of the bulk floor - not more than 3%. Use a hygrometer for measurement.
4. Make sure the subfloor is clean, remove debris, dust and dirt with a vacuum cleaner. Then the base is better primed to ensure better adhesion.
An even foundation is the key to a beautiful, even floor covering that will not overturn or crack.
pencil
square
roulette
knife
beater cord
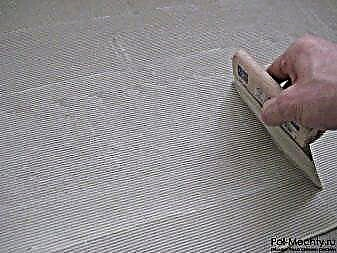
glue spatula (recommended by glue manufacturer)
rubber roller or cork lapping board or edging hammer
Installation of PVC tiles - step by step instructions
When the base is ready, and the soil is dry, you can begin laying work.
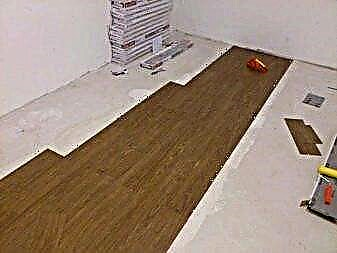
1. The markup is in progress. First you need to find the center of the room by drawing two diagonals. Then, a line is drawn through the center that sets the laying direction. The scheme is determined from the project - along, across, diagonally, herringbone, with a shift.
2. Lay out the tiles according to the scheme, make sure that tiles with the same pattern do not lie nearby. Assess the type of future coating, then collect the tiles and proceed with laying.
3. At the time of gluing, it is recommended to eliminate direct sunlight on the floor to avoid uneven drying of the glue.
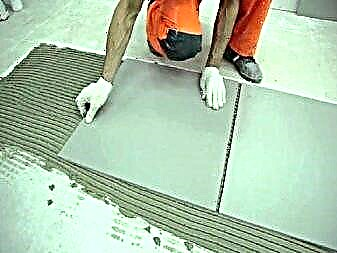
4. Start laying from the center. The glue is applied with a notched trowel to a small floor area so that the PVC tile will be glued to this area before the "open glue time" has expired. Do not apply glue in two layers!
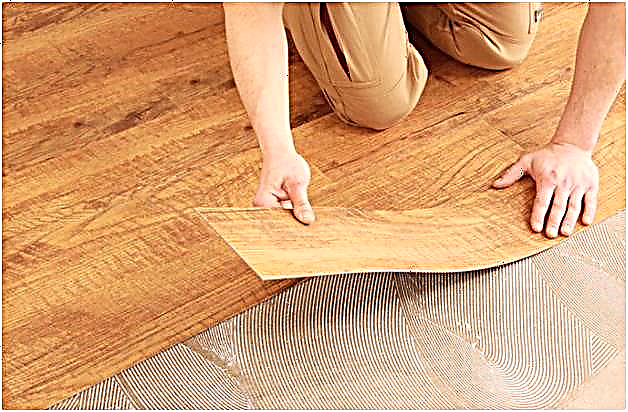
5. The stacker is moved in one direction when it is on already laid tiles.
6. The glued surface of the PVC panels is wiped with a dry cloth and pressed to the floor with a tool. Monitor the absence of gaps and shifts, observing the laying geometry.
7. Received glue is removed with a sponge or damp cloth.
8. When laying the coating near the walls, the tiles are trimmed in accordance with the remaining space. A gap is left near the wall 3-5 mm.
9. Measure and cut pipe holes. Close the space between the pipes with a cut piece of tile.
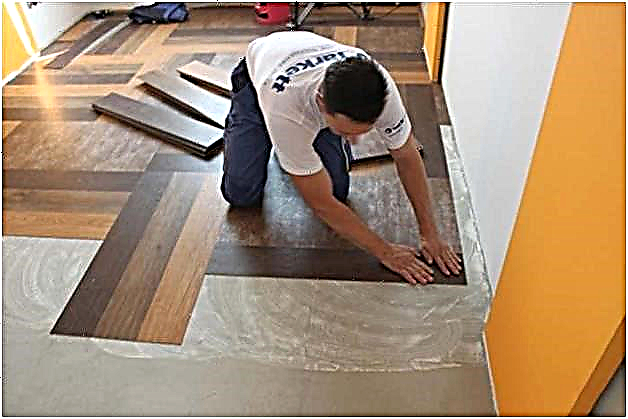
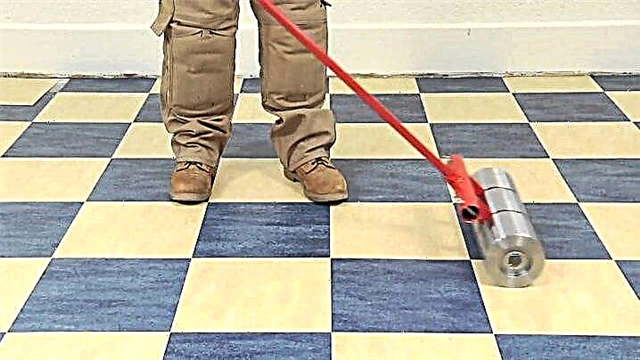
10. For better styling, each section can be rolled after pressing with rollers 50-75 kg.
11. When all tiles have been laid, leave the coating until the glue dries.
12. You can carry out dry cleaning after installation. Wet - not earlier than in a day. Operate the cover, bring furniture - only after 48 hours.
Floor preparation
It depends on how the floor is prepared before laying, how firmly the tile adheres to the base.
The ideal surface with which you can begin to work is flat, clean, dry, smooth. The old base is either removed and then poured with a self-leveling cement composition, or covered with OSB plates (as smooth as possible). If the room has a cement floor, then you must:
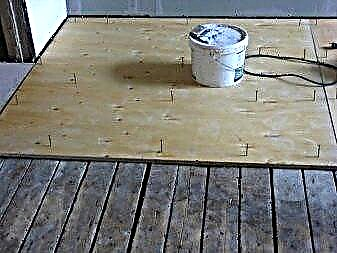
If slabs of plywood or OSB are laid on the wooden floor, then you need to make sure that all the screws are thoroughly recessed into the slabs. The joints between the plates are coated with putty. The floor is vacuum cleaned from fine dust.
A primer is applied to the prepared surface, and when it is completely absorbed, the humidity of the floor is checked. To do this, you can use a special construction device. Humidity should be no more than 5%. You can also apply the “folk” method of checking humidity: put a paper towel on the floor, cover it with plastic wrap and stick it with tape along the perimeter. If after 6-8 hours condensation does not appear under the film, the floor is dry and tile laying can begin. The temperature in the room should be + 15- + 30 degrees.
Which tile is easier to install
Depending on the method of gluing tiles proposed by the manufacturer, the material can be divided into several categories.
- With adhesive. Elements are interconnected by four adhesive strips. This is the only type of PVC tile that is suitable for laying on top of an old floor covering. If for some reason you cannot dismantle pieces of old linoleum or do not want to cover the wooden floor with plates, then you can use this type of tile.
Features of PVC Tiles
PVC tile is an improved and modified version of linoleum, cut into equal pieces. The industrial composition of the material consists of PVC plastic in the form of high-quality granules.
The floor tile consists of six layers: the base one is made of PVC, two secondary layers with the addition of quartz, balance sheet made of fiberglass, and then decorative and protective. This form of PVC is made using hot casting. The main material is melted and poured into a special form, after cooling of which a tile ready for use is removed from it.
The multilayer PVC coating allows it to be used for floors in rooms for various purposes.
The coating has a dense, stable shape, which is formed by pressing under high pressure. In a similar way, manufacturers create not only a smooth surface, but also an original relief. Therefore, customers can choose any model of flooring.
The second step in creating linoleum tiles is quality control. This product is a kind of innovation in the construction market, and it is subject to high demands on several indicators at once: fire safety, physical resistance, anti-slip properties, attractive appearance.
In connection with the great popularity of such tiles, several similar names appeared: vinyl, linoleum, polyvinyl chloride, quartz vinyl, modular, plastic. Therefore, referring to the seller of building materials for advice, you can safely call this material any convenient option. You will understand and show the available range.
It is difficult to talk about the cost of the material, because in all regions the prices differ. But compared to conventional linoleum, PVC tile is about 1.5-2 times more expensive. In construction stores at this price you can find premium linoleum.
However, such a tile has several advantages:
- Convenience of transportation. Tiles are loaded into boxes. Linoleum is folded into a long heavy roll, which is extremely inconvenient to drag on yourself.
- Although vinyl tile is more expensive, there are practically no scraps left from it, which cannot be said about the roll coating.
- Easy installation.
Linoleum tiles have other advantages:
- Aesthetic appearance. There is a wide variety of colors of vinyl tiles, among which there are bright colors, beautiful drawings and imitation of natural materials (wood, stone).
- Comfortable use. It’s nice to walk on this floor. It does not slip, even if moisture has got on it.
- Unpretentiousness in leaving. The material has a smooth surface, which eliminates the adhesion of dirt. The coating is easy to clean.
Layout Methods
Like ceramic tiles, PVC tiles can be laid in different ways, depending on the type of base. The main thing is to lay the tiles in straight rows. It is suitable for both wooden and concrete floors.
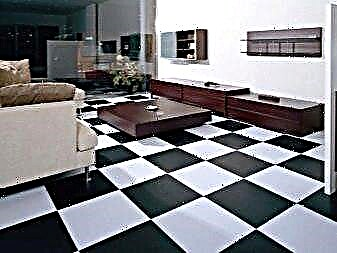
- Type of laying "Square". This is the easiest and most commonly used method. Square tiles are stacked one to the other, completely connected by the sides, upper and lower ends. It’s hard to make a mistake here.
The main principle of laying will not allow you to deviate from the desired direction and cover the floor unevenly. This method has two options: to lay PVC tiles along the walls of the room or diagonally.
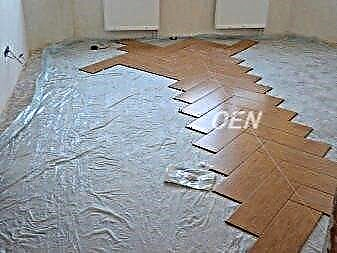
- Type of laying "Herringbone". With this method of laying, it is important to start laying from the middle of the room. Each "branch" of a conditional Christmas tree should consist of 2-4 tiles. Then on the sides of the main "Christmas tree" you need to put one more in the same way.
- Type of laying "Deck". The main rule is to start laying elements perpendicular to the short side of the room. Then each subsequent row is shifted by a third from the previous row. It turns out a kind of "ladder".
Necessary tools
For laying the floor, linoleum tiles alone are not enough. Additional funds will also be required. The list of auxiliary tools includes things that are in almost every home:
- roulette,
- clerical knife in order to cut excess coating,
- paper tape 5 cm wide,
- 1 meter long steel ruler,
- a wooden lapping block upholstered in fabric or felt,
- notched trowel with small teeth (in case you chose an adhesive tile).

Foundation preparation
Before proceeding directly to laying, you need to prepare the base. The floor must be flat, dry and hard. If the original flooring does not meet the requirements, then you need to bring it in good condition.
Vinyl tiles can be laid on the floor from any material: fiberboard, plywood, hardboard, gypsum fiberboard, concrete.
Usually for an uneven concrete floor it is enough to pour it with cement mortar and distribute it over the entire surface. Next, wait until complete solidification. Cement becomes as dense as possible in a few days.
The wooden floor must be aligned with plywood 12-15 mm thick. The fasteners must be hidden, and the cracks should be puttied with acrylic, then impregnated with soil for greater strength.
Next, check the moisture content of the base. According to the rules, it should not exceed 5%. In construction, this procedure is carried out using a special device. But rarely can anyone meet him in the household. However, there is an alternative method.
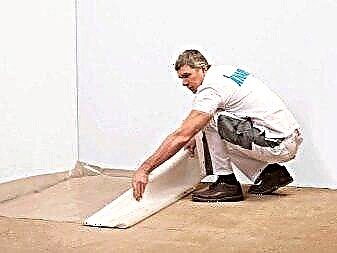
To do this, you need tape and polyethylene without holes. We cut out a small part of cellophane and glue it with tape in the base. It is important that everything is airtight. Leave for a day. A good indicator would be the absence of condensate. The floor is ready - you can start laying.
Mounting technology
The principle of laying linoleum tiles in an apartment with your own hands largely depends on the type of fastenings of this floor covering. There are four types of them:
- Castle tile. The hitching of individual elements occurs due to fasteners similar to puzzles. Such a tile device reliably connects the parts together. Adhesive base is no longer required. It is enough to have a flat floor with a permissible transition of 2 mm. Dense entry of parts into each other is achieved with a rubber mallet. A plus to the convenience and reliability is the fact that such tiles can be assembled and disassembled several times.
- Tile on glue. An adhesive specifically designed for vinyl tiles is on sale. It is not difficult to lay it - glue is applied to the inside of each element and laid on the floor in the most convenient way. It is not recommended to glue the coating in the rooms of frequent residence, since the glue fumes can be harmful to health.
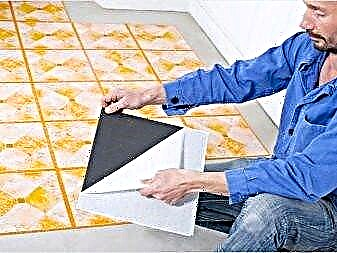
- Self-adhesive coating. Unlike glue tiles, where you need to impregnate the elements yourself, here the glue has already been applied to the tile, all that remains is to lay it down by removing the protective film.
- "Free" fragments. The laying principle, like that of a laminate, is “butt to butt”. On the sides of the elements there is a thread that easily fits into the thread of an adjacent fragment. Thus, laying tiles is simple and convenient.
Installation of castle tiles
Before putting the coating, it is recommended to heat individual elements with a hairdryer to give them greater elasticity, which will simplify the process of flooring.
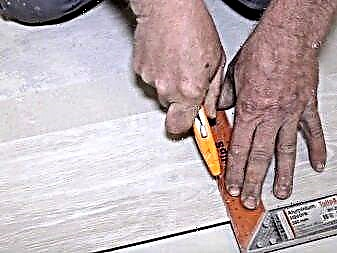
Installation of tiles "lock" is right to start from the corner of the room. Lay the groove against the wall from left to right. The uneven edges along the wall are then cut with a knife. When the first row is completely laid, and you reach the second wall, then for sure you will have an extra distance, which will not include another fragment. In this case, cut off from the whole element the part that will go into the remaining space.
To do this, measure the distance with a ruler or tape measure. Then we do the marking on the tile and crop along the line. First, cut the top layer of the fragment with a knife, and then break it. The rest of you can start laying the next row.

Mounting tiles on glue
For PVC tiles, it is worth buying special glue. It can be anything, but designed specifically for this material. Apply glue to the tile with a spatula, evenly distributing it on the surface.
Spread the first row strictly along the marked line. If you use the “square” method, then the wall will be such a line. If we are talking about the "Christmas tree" or "deck", then the control line must be drawn independently, after measuring the boundaries.
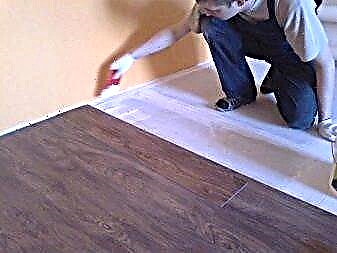
So that the newly laid coating does not shift to the side, you can temporarily fix it with tape.
After the first tile has been glued, swipe it by hand, expelling air from under the material. Then stand on the tile with your foot, stand a little on it for better fixation. Next, lay the rest of the elements in a similar way, checking that the tile is "butt to butt".
When two rows have been laid, you should take a bar and draw it across the entire width. So the air will finally come out from under the cover. For greater reliability, you can use a rubber mallet by tapping the floor with it.
Installation of self-adhesive tiles
Self-adhesive linoleum tiles are laid in the same way as tiles on glue, but still a little easier, because you do not need to apply glue in this case.
To lay a self-adhesive tile of tools, you need very little: a roller, a ruler and an office knife.
You can start installation from anywhere in the room: from the corner, middle, or at one of the walls. Before gluing an element, remove the protective sticker from it.. Masonry occurs “butt to butt”. After the first row is laid, walk along it with a roller to expel air.
Be sure to leave a distance of 5-6 mm between the tile and the wall. This is necessary because at higher temperatures, for example, in the summer, the material expands. To avoid waves or bubbles, it is better to leave a place in advance. Such a gap can be hidden by installing skirting boards around the perimeter of the room.
Recommendations
In addition to the basic step-by-step instructions for laying modular tiles, there is also a series of tips identified through experience.
- Do not start masonry immediately after purchasing the material. Allow the tile to lie down during the day. So it warms up to room temperature and takes the correct shape.
- Before starting work, check if the floor is dry. If for some reason it is not completely dried, then laying the coating is extremely undesirable. In this case, there is a high risk of mold formation under the tile in the near future.
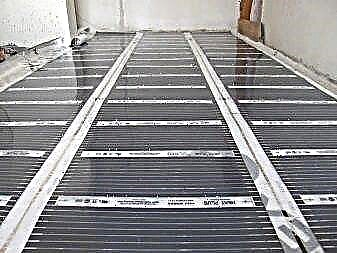
- After covering the floor with vinyl tiles, consider the fact that its thermal resistance is in the temperature range from -20 to +300 degrees. PVC coating is excellent for the “underfloor heating” system.
- Flooring is available under certain markings that apply to different types of rooms. For the house, tiles with a mark of 21-23 are suitable, for public spaces - 31-33.
- Avoid getting acetone and other solvents on the PVC flooring. The surface of the tile may be affected.
Having opted for vinyl tiles, you will not regret it. You can evaluate its convenience from the moment of flooring. Having determined for yourself the most suitable type of flooring and having decided which installation method to use, feel free to get to work. Our instructions will help you lay the floor quickly and without unnecessary trouble.
For how to lay PVC tiles on the floor, see the next video.
General requirements for a rough floor
The base for the castle vinyl tile must be flat, dry (humidity level does not exceed 5%) and cleaned of building debris and dust (use only mechanical means, without chemicals) . To process all visible cracks and gaps with putty or special repair compounds with subsequent grinding.
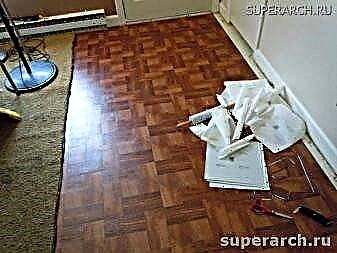
Processing the old floor before laying
Laminate, parquet, cork, carpet, linoleum or vinyl - if possible, old floor coverings must be completely dismantled, up to concrete or wooden floors. Alternative solutions:
- Tile . It is allowed to fill with a leveling compound designed specifically for ceramics, if you remove the old tile is too problematic.
- Parquet board . Sew waterproof FSF plywood or alternative sheet materials. To avoid squeaks and destabilization, leave technological gaps between the sheets - not more than 5 mm.
- Concrete floor. To align the base base for laying the vinyl laminate, a finishing leveler is used.
Foam or cork substrates are used to improve the insulation properties of the floor covering. .
DIY vinyl laminate flooring technology
Installation of a vinyl laminate is carried out using a click system without fixing to the base base. The panels are interconnected according to the principle “comb to groove” and vice versa - “groove to comb”.
For cutting PVC laminate, it is enough to carefully cut through the upper protective layer and bend the panel along the cut line.
Vinyl Tile Tools
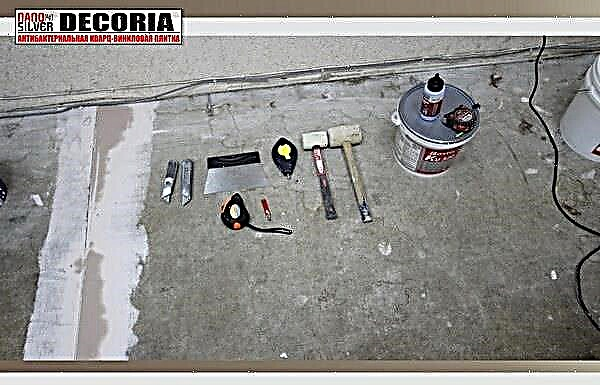
- Putty knife. The notched trowel for glue is the most important styling tool. Choose a special spatula, specifically for applying glue to vinyl, with micro teeth and an approximate consumption of 250 to 400 g / m2.
- White mallet with rubber brisk. It is white so that there are no traces of molding on the surface. An alternative is to glue the firing pin with masking tape.
- Beat cord or level. A tool is needed to draw a straight landmark line.
- Knife, tape measure, corner, pencil.
Laying technology, as well as all illustrations are shown on the example of Decoria quartz vinyl tiles, video reviews - from FineFloor experts. PThe suggested recommendations and instructions apply to all adhesive-mounted vinyl flooring.
Smooth surface
According to SNiP, differences in flooring should not exceed 2 mm for every 2 meters. The calculation is valid for a new screed, but difficult to achieve if the base floor is being restored. And this is another advantage of vinyl: even on an uneven base, PVC tile will stick and become a single monolith, and the textured pattern will smooth out the differences visually.
Dry floor
Screeds and mixes have a certain drying period, which depends on the specific material: from 2 weeks to 2 months. To check whether all the moisture has come out is simple: it is enough to glue a piece of PE film with tape for a day. If after 24 hours there is condensation on the wrong side, then laying vinyl tiles should be delayed until it dries completely.
Solid base
The base floor must be strong enough not to collapse under the expected loads. In addition, note that only one die must be removed if surface damage occurs. In this case, the foundation should not suffer, as for example, in the case of swollen linoleum or OSB-plate, part of which will be removed together with vinyl. Also an unacceptable base is a poorly doused screed, which will crumble under the slightest load. The result is re-installation of vinyl tiles throughout the room.