Finishing work plays a huge role in the design of a modern interior. At the same time, the ceiling of the kitchen deserves special attention. It should not only have a beautiful appearance and harmoniously combine with the overall design of the room, but also be resistant to pollution, the appearance of fat and high humidity. Today, there are many options for finishing the ceiling, among which the rack ceiling is especially popular. This type of decoration fills the kitchen with an atmosphere of coziness and comfort, the room becomes stylish and sophisticated.


The installation of a rack ceiling in the kitchen represents a new direction in construction work, thanks to the special characteristics of the design, it is simple and reliable in operation, easy to install, affordable. In addition, the rack ceiling is presented in a variety of shapes, textures and shades, which allows designers to create rounded, straight and broken lines when decorating the kitchen interior.

Features and Benefits
The rack ceiling is a coating assembled from individual metal battens of various shapes. Thanks to the use of special decorative inserts, at the end of the installation work, a solid surface with a rounded or flat shape is obtained. Often in the kitchen they prefer to install beautiful multi-level designs that distinguish among themselves the color of the inserts.

When installing a rack ceiling in the kitchen, it should be borne in mind that the height of the room will slightly decrease, since finishing work involves not only leveling the base, but also placing all the necessary communications under the duct. The ceiling slats are made of aluminum coated with a special metallized material, and the applied layer of matte polymer provides a variety of color shades. Aluminum rails are characterized by increased strength and lightness, since the thickness of their sheets does not exceed 0.7 mm.

Slatted ceilings have many advantages. They are antistatic, moisture resistant, hypoallergenic, not afraid of temperature changes in the room. In addition, such ceilings are durable in operation and are not exposed to microorganisms, require minimal maintenance. The ease of installation of rack ceilings allows you to perform installation work without the involvement of craftsmen, as everyone can hang a ceiling structure with their own hands.


A huge selection of slatted ceilings allows you to create different levels and curved surfaces with an unusual combination of patterns and colors. This type of design is well suited for the kitchen, since high humidity and hot steam do not harm its surface, and maintenance and care can be performed only several times a year.

The rack ceiling is selected in the kitchen, given the style of its design, as well as the functionality of the material. Such ceilings differ among themselves in the execution of slats, in construction, material and design. Each individual species is characterized by individual application specifics.

If we consider rack ceilings in design, then they can be closed and open type. The open type of construction is characterized by the installation of rails at a small distance from each other. Basically, the gap in this case is 16 mm, so it is chosen for rooms in which it is necessary to constantly carry out ventilation. The closed type of construction forms a solid surface with small seams between the panels.

If we consider rack ceilings by material, then at the moment there are plastic, steel and aluminum rails on sale. The most popular and durable is the aluminum rack ceiling. Aluminum withstands temperature extremes, is resistant to moisture and corrosion, and is durable. In addition, it is not flammable, so it is an indispensable option for the ceiling in the kitchen.

Steel ceilings, as a rule, are used in warehouse premises and in production, as they are characterized by durability and high sound insulation. The plastic rack ceiling received good reviews. At the moment, plastic is considered the most versatile material. It has a beautiful appearance, is inexpensive, but belongs to fire hazardous materials and quickly loses its original color in the sun.

Distinguish between Italian and German style of execution of the form of slats. The German style is characterized by the presence of rectangular corners. Such slats are perfectly combined with between the rack inserts. The Italian style is distinguished by rounded edges, slats in this design are installed simultaneously with closed joints.
As for the design, the slats can have a mirror, glossy and matte surface of any color, with or without a pattern. The mirror and glossy ceiling visually expands the room, creates the effect of weightlessness and looks beautiful in a modern design. Matte ceilings are suitable for large rooms with rich decor, decorated in a classic style.
Rack classification
When choosing a material for a kitchen ceiling, you need to know the types of structures:
- Openings type of slatted ceilings: connect with a small gap, suitable for those rooms where the ceiling height is more than 5 meters,

- Closed type of slatted ceilings: connected end-to-end, according to the principle of wood lining,

- The ceiling with the addition of decorative inserts: it resembles an open type, but the gaps here are closed by aluminum strips, so that you can combine colors and “play with light”.


The ceiling with inserts is considered the most convenient in operation, but care must be taken in choosing a design - combining more than 3 colors is not recommended.
The closed type of slatted ceilings in white, or veneered, will harmoniously fit into almost any interior. Such a ceiling is really very similar to the ceiling of a wooden lining, which is a more traditional and expensive type of ceiling decoration.

How to choose the right material
The rack ceiling is purchased with traverses and suspensions.

Before ordering, the amount of material is calculated, for which the area of the room is measured and 2-3 cm are added to the received dimensions for a reserve.
Advice! If your kitchen is irregular in shape, then another carrier rail must be included.
And in order for you to get really high-quality panels, you need to focus on the following recommendations:
- High-quality slats are sold exclusively in a protective film, which helps to prevent damage during transportation,
- A set of lighting devices is best purchased immediately with the ceiling,
- Laths with increased thickness will ensure the integrity and durability of the structure.
No less important is the design of the rails, because their color palette is wide enough. Popular are:
- White ceiling rails with matt enamel,
- Mirrored chrome plated fit perfectly into an interior like modern and high tech,
- Reiki can be painted in gold, bronze and copper,
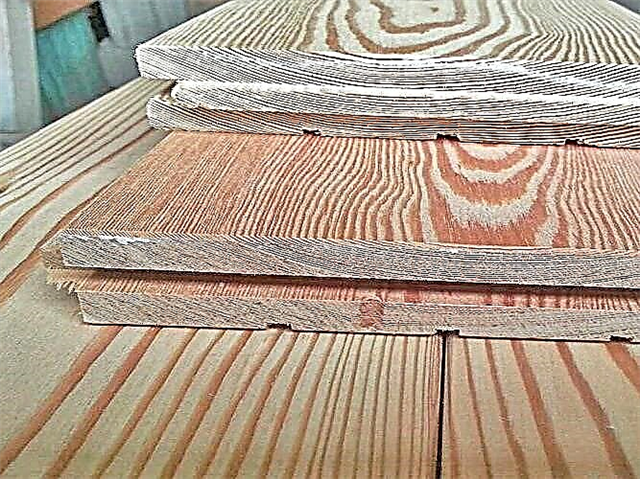
- Laminated with natural wood veneer - not only suitable for classic style kitchens or country style, but for any other.

How to install a rack ceiling in the kitchen with your own hands
First prepare the necessary materials and tools:
- The ceiling kit itself with traverses and suspensions,
- Drill,
- Laser level and tape measure,
- Dowels and screws,
- Scissors for metal,
- Knife, pliers, screwdriver,
- Ladder.
The installation of rack ceilings in the kitchen is no different from their installation in the bathroom, only in the bathroom the walls can already be tiled, which somewhat complicates their drilling. And in the kitchen it is even easier and do-it-yourself installation can be easily done even by a beginner.
So, the sequence of work is as follows:
- The installation height is determined and the ceiling is marked with a laser level. An assembly line is applied around the entire perimeter.

- Next, we fix the end profile along the drawn line. For express installation, the perforator holes are made every 40 cm, and then sleeves from plastic dowels are driven into them. After that, the profile is fixed in prepared places with screws.

- When the end profiles are fixed, the traverses are mounted, which were previously cut to the desired length. First to the profiles themselves, and then to the suspensions.


- In size, intermediate profiles and trims are cut with scissors for metal, which are fixed in the grooves of the end profile and the mounts of the traverses.

- The next element is installed in the same way, and an intermediate profile, if any, is placed between them.

- The sequence of actions is carried out before the installation of the last river.
- The last bar is installed, which, if necessary, can be cut along.
- And now you can install the lamp in a pre-prepared hole, and your rack ceiling for the kitchen is ready.
You can learn more about all the nuances of DIY installation in the following video:
Varieties
Different types of ceilings are distinguished from battens depending on the materials, the method of laying and even the shape of the panels. Let's consider each view in more detail.
As materials of false ceiling ceilings use aluminum, steel or plastic.
Aluminum ceilings lightweight, corrosion and rust resistant. They freely pass air, are resistant to temperature extremes and are not deformed under the influence of steam. In addition, such ceilings are easy to maintain and have a relatively affordable price. That is why aluminum rack ceilings are the most popular option for use in the kitchen.
 Aluminum battens can be painted in any color.

Steel ceilings are more expensive than aluminum. They are distinguished by excellent sound-absorbing properties, look spectacular and easy to care for. However, such ceilings rust under the influence of moisture and condensation, so in the kitchen they can only be installed if you plan to put a powerful hood there. Otherwise, after a couple of years, it will be necessary to replace part of the slats above the stove and sink.
 It is better to install steel rails with special protection against moisture, then they will last you longer.

Plastic ceilings not affected by moisture and are cheaper than aluminum. They are often painted in a wide variety of colors, making it possible to apply a wide range of design solutions. Such ceilings are easy to maintain, but they are not too resistant to physical influences: plastic can be scratched or simply broken. Plastic slatted ceilings are acceptable for use in the kitchen, but they must be handled with care.
 Plastic is considered the most versatile material.

Separate rack ceilings and the type of installation of rails. The closed slatted ceiling is mounted so that the panels lie adjacent to each other. For the kitchen, this option is optimal - it is the easiest to clean. In open slatted ceilings, between the panels there is a gap of up to two centimeters.
This technique may look impressive, but it is necessary to make a thorough rough finish and regularly remove dust and small droplets of fat that will inevitably settle inside the structure.
In ceilings of a combined type, the gaps between the panels are closed by inserts of a different color or of a different material. This allows you to create complex designs with various color effects, to achieve refraction of light and other visual effects.
There are single and multi-level rack ceilings. The former are ideal for small kitchens. Complex structures with two or more levels will fit well into a spacious room that needs to be zoned.
 Multi-level rack ceiling
Slatted ceilings can be both flat and voluminous. In the second case, they are made in the form of a wave, with various bends, of any other non-standard shape. It must be understood that such a ceiling requires an appropriate wall height - ideally at least 3.5 meters.

The slats themselves are of two types - solid and perforated. Caring for the former is much simpler, but the latter prevent condensation and allow various experiments with hidden lighting.
 Perforated slats
Advantages and disadvantages
Like any other type of finishing, rack ceilings have both their advantages and disadvantages. We recommend that you familiarize yourself with our table to take into account all the factors and to understand whether they are suitable for your kitchen.

As you can see, the number of pluses is incommensurably greater than the number of disadvantages. Summing up, we note that slatted ceilings are not recommended for use only in kitchens with low walls - in other cases, they can be an ideal option.
Lighting
As we wrote above, the design features of rack ceilings provide ample opportunities for experiments with lighting.
Important! Whichever method you choose, you will need to draw a preliminary plan for the layout of the lighting and pre-conduct all the wires. In addition, for some types of fixtures, the connector on the rails must be cut in advance.
Most often, spotlights are used to illuminate rack ceilings. They are easy to install, they allow you to create zone lighting (for example, brighter above the work area and dimmer above the dining room). In addition, often such lamps are much more economical than conventional incandescent lamps.


For two-level structures, spotlights are often used in combination with LED strips. The level transitions highlighted around the perimeter look very impressive, facilitating the zoning of the room. For open slatted ceilings, you can use a hidden lighting system.

True, it is not always enough for effective work in the kitchen. In this case, we recommend that you use the combined options - for example, install lamps above the working area or hang a chandelier.
The integrated raster lights also look spectacular. However, they are not suitable for plastic structures. Firstly, such a lamp heats up quite a lot. Secondly, its weight can bring down the entire ceiling. Therefore, they are exclusively suitable for steel rails. And, of course, do not forget about ordinary chandeliers. If you choose the right lamp, it will fit the ceiling and the overall design of the kitchen.

Nuance! If you choose rack panels with reflective features, discard the carob chandeliers. An ugly reflection can spoil the impression of even the best design.
How to care
Much depends on what type of rails you have chosen. The dull and painted panels of the closed ceiling can simply be periodically cleaned from dust and dirt. We recommend that you do not use abrasive detergents and wire washcloths - they can damage the coating, leaving ugly scratches.
With mirror rack ceilings it is more difficult: any spots are visible on them, which means they will have to be washed quite often. We recommend using glass cleaner: they will add shine and will not leave streaks. However, discard spray guns - they are unsafe in the kitchen. Apply the product directly to the sponge, and then gently wipe the panels.
Life hack! If you have high ceilings and don’t want to wash them while balancing on a stepladder, use a mop with a soft, lint-free nozzle.
Slatted ceilings in the interior of the kitchen
It should not be considered that rack ceilings look dull and monotonous. Modern materials allow you to choose the right type of coating for any interior.Wide plastic panels, firmly fitted to each other, can fit almost all styles. It all depends on the color of the rack ceiling. Want a classic interior? Choose wood-painted slats. Alternatively, it can be plain panels - beige, brown or just black.


For modern interiors, this type of ceiling can be ordered in various colors. You can choose a monochromatic bright option - red, blue, green. Focus on the overall color scheme of your kitchen - remember that a combination of more than three saturated colors looks tiring and overly colorful.
A combination of racks of various colors looks beautiful. Make sure that they fit together. Some turn the ceiling into a peculiar gradient, achieving a smooth transition of shades between the panels. True, in this case, installation will require special care, and materials will cost more.

Modern interiors can also be decorated with metal slatted ceilings. It is not necessary to dwell on the natural color of the rails. Gilding, silver, bronze of various shades look stylish and interesting.

Experiment with the styling and shape of the panels - you may be able to find the perfect solution for your kitchen. The color palette of slatted ceilings is extremely wide. Some companies also provide a range of battens with patterns or textures that mimic natural materials. Such ceilings look very interesting and unusual. But get ready for the fact that they will have to pay a considerable amount.
However, color is not the only way you can decorate your ceiling. It is not necessary to install rails exclusively parallel to each other. The herringbone ceiling type does not lose its relevance. In this case, the panels overlap each other, simulating a Christmas tree pattern.
True, we do not recommend this technique for use in a small kitchen - it visually makes the room smaller. Rack ceilings laid out in certain geometric shapes look good. So you can zone the space, achieve visual expansion and increase the room.

 Diagonally spaced planks visually expand the room.
If you want an open rack structure, experiment with the layout of the panels. It is not necessary to install them horizontally. Mounted perpendicular to the semi-rack ceiling, it looks very stylish and unusual. If you select panels under the tree, the design is ideal for chalet, country, Scandinavian styles.

Please note! In this case, special attention should be paid to the rough finish of the ceiling - it will be well visible.
Try a combination of slats of different widths and textures - sometimes in this way you can create an original and very beautiful coating.


The volumetric effect of the mosaic also deserves attention. It looks especially impressive if part of the coating goes down to the wall. True, there is a nuance - this technique slightly hides the height of the room. Considering the fact that slatted ceilings already occupy a certain part of the vertical space, this option is categorically not suitable for low kitchens.
This is the simplest method of a two-level rack ceiling, so before ordering the installation, measure the height of the walls. Is she less than three and a half meters? Have to look for another option. Two-level slatted ceilings are more suitable for large, spacious kitchens. They not only look beautiful, but also facilitate the zoning of the room. Lower the ceiling above the rest area and raise it above the work area. Visually, this technique makes the kitchen much more comfortable.
In addition, in this way you can hide the protruding communications, while not completely blocking access to them. Unlike gypsum plasterboard and suspended ceilings, rack and pinion allows you to dismantle part of the structure for cleaning communications or repair work.
Wavy rack ceilings look beautiful. True, they will require at least forty centimeters of wall height and a sufficiently large area. Otherwise, the ceiling will look too massive and ruin the interior.
As you can see, modern ceiling ceilings are not only functional and easy to care for, but also very diverse and beautiful. We hope our selection has helped you determine the desired design.
What is a rack ceiling?
Such a coating consists of a kind of aluminum beams called rails. Lightweight and flexible, they are easily mounted on a special profile.
These ceilings are easy to install, well suited even for thin ceilings due to their light weight, which allows you to choose the right design for any type of interior.


However, their main difference is not in color, but in size. Most standard rails are 300 or 400 millimeters long, and the width can vary from 90 to 200. The thickness of the material can also be different and affects the strength of the structure.
By the way: If for some reason the standard dimensions are not suitable for you, there are companies that can make rails of any parameters to order.
Classification of rack ceilings
Before installing rails, you need to decide what result you want to get. There are several ways to install such a coating:
- Open slatted ceilings are fixed with a small gap between the beams - a good reception for spacious rooms with high walls. In addition, it allows you to use a hidden backlight, which looks very impressive.
- The closed structure is mounted close to each other and creates an integral canvas.
- For decorative ceilings, various inserts are used, for example, from aluminum or flexible plastic.
- The corrugated sheet allows the flexibility of the rails. However, keep in mind that it is suitable only for high kitchens - in low kitchens, however you would like, you will have to choose another option.


We offer you a universal scheme that will help you cope with the process yourself.
Mounting
Installing a ceiling in the kitchen is not as difficult as it might seem at first glance. Especially if you follow our recommendations. In addition, professional tools will not be needed: dowels, a drill, screws, and a screwdriver are needed. And, of course, structural elements: profiles and rails themselves.
- 1. Mark with a marker the desired level of coverage. The distance must be at least five centimeters from the final floor. Using the construction profile (more details can be found here), mark the perimeter of the room.


4. Now you need to proceed to the installation of suspensions. Using a tape measure, mark the spots for the tires. Start at a distance of 30 centimeters from the wall, then increase the step to 1 meter. Place them parallel to each other. Fasten the suspensions with screws and wall plugs to the pre-drilled holes.

5. Bearing tires must be installed perpendicular to the rails, at the same level with the profile. They are attached to the suspensions with a screwdriver.
Important: Do not allow bumps! The appearance of the final coating depends on this stage! Note that the distance between the profile and the tire should be about 1 centimeter.

6. The most important step is to lay the rails directly. After you remove the protective film, measure them. We remind you that the length should be somewhere half a centimeter less than the distance between the walls.

Insert them into the guides and snap the latches. Mount the rails in series, from the center of the room to the walls.
Nuance: If the side rails are too wide, they can be cut with scissors for metal. To do this, draw a line with a pencil in the right place, then walk along it with a knife. Then you have to bend and unblock the yarn along the line until it breaks.

As you can see, it is not so difficult to install a rack ceiling in the kitchen with your own hands. Moreover, professional construction companies often overstate the price for such work.
Slatted ceiling: system features
This option is one of the types of suspended ceiling. It consists of a light metal frame and suspended rails - from aluminum, steel or plastic. The latter option is implemented much less frequently, since this material does not have the properties that distinguish metal products.
 The system is extremely easy to assemble, adjustable in height, but the design is quite complex. The rack ceiling includes the following elements:
- guide profile - traverse. A strip made of aluminum or galvanized steel with special narrow joints for fixing the rail,
suspensions - fasteners for the construction of rails. We use spring suspensions with knitting needles - this option allows you to adjust the height of the ceiling structure, - skirting boards - overlap the joints between the edge of the rail and the wall, and additionally fix the straps,
- actually rake - a strip of metal with curved edges. It is inserted into the slots of the beam and is firmly held. The length of the product usually does not exceed 3-4 m, although there are products up to 10 m long. Width - 90, 100, 150, 200 mm.
 The installation of the product differs from the installation of a conventional suspension system. The frame here does not fix so firmly, but hangs on suspensions. In one place, the structure holds its own weight and ceiling skirting. Reiki mounted only on the frame and rest on the baseboard.
How much this solution costs depends on the type of ceiling, material, configuration and size of the ceiling surface.
Rail material
Before deciding how this is a profitable option for the kitchen, it is worth learning about the material used. It makes sense to consider only metal products.
- Aluminum - lightweight, sufficiently strong material, completely not prone to corrosion: in air, aluminum is instantly covered with an oxide film, which, in fact, determines the appearance of the product - a silver-gray, shiny surface. Aluminum does not rust, does not need any protection and can be painted in any shade.
There should be a drawback in this product, but, besides the low thermal conductivity inherent in all metals, it is difficult to name anything else.

- Steel much stronger and can create a more interesting surface, because it is not only painted, but also sanded and polished, that is, it creates a different degree of gloss. However, steel is subject to corrosion, so in practice they deal with galvanized or chrome-plated steel, as well as steel with a polymer coating.
The disadvantage is that if the coating is damaged, the alloy may rust.
Why are metal products more interesting than plastic? The thickness of the rail is 0.3-0.5 mm, which allows you to give it any, the most intricate shape. And since the metal is durable and stiff, the rail holds this shape. As a result, the configuration of a rack metal ceiling can be extremely complex and remarkably spectacular.
Advantages and disadvantages
The rack ceiling for the kitchen is suitable in many ways.
 Its main advantages are as follows:
- hygiene - metal is a low-porous material, which means that it prevents the growth of bacteria. Steel, in principle, is the most practical material in the kitchen,
- easy care: the material does not absorb dirt, grease, soot, so washing it is simple, a couple of movements with a wet sponge is enough,
- structural strength guarantees a very long service life,
- the condition of the base ceiling does not matter. In addition, under the suspension system, you can easily hide the most cumbersome communications,
- system installation is very simple and does not take much time. If the shape of the ceiling is complex, then it is better to entrust the installation to professionals
- product design is not limited to different color solutions: a polymer coating can imitate wood and stone, but, in fairness, they rarely resort to this technique. The metal itself has an excellent luster, in addition, it can be given the color and shimmer of a more expensive metal - gold, bronze, osmium or a metal that does not exist in nature. For example, purple with a characteristic sparkling metallic sheen,
- an even more interesting feature is the possibility of volumetric solutions: wave, cascade, dome, and so on - with enough space you can implement any solutions.
 The disadvantages are here:
- if the polymer or zinc coating is damaged, the steel rails may corrode. This does not apply to aluminum,
- the suspension system takes 10-15 cm from the height, so this solution is impossible for low rooms,
- for repairs, you will have to disassemble the ceiling from the wall to the damaged area: you just won’t be able to remove a couple of battens
- the striped surface formed by slats is not allowed in every interior.
Types of designs
There are indoor and outdoor ceilings.
- In the first case, between the rails during installation leave a gap - ventilation. This solution is designed specifically for large areas and is implemented with a ceiling height of more than 5 meters.
- Closed - ceiling slats are installed end-to-end and resemble a lining. For the kitchen, this is a much more suitable option.
 Its variety is the option with decorative inserts. In this case, the slats are fixed with a gap, but the latter is filled with a decorative insert of the same metal. As a rule, the insert and rail are made in different, often in contrasting colors - this combination looks extremely elegant. You can combine more shades, but this technique is used infrequently, because it looks too colorful.
Surface types
The bar itself can have different designs.
- Smooth - is applied everywhere. It is a smooth surface, matte or shiny.
- Perforated - a special product, as perforation here does not exist for beauty. Holes can play the role of ventilation gaps - for very large rooms, or serve as a means of sound insulation, and are very effective. Perforated will cost more.

Design opportunities
In addition to the fact that the aluminum or steel rack ceiling will last for many years, does not require repairs and is very hygienic, it can also serve as an effective design tool. This is confirmed by at least the fact that the rack system is made to order for each specific room.
- The form. The rail, like the lining, acts as an element that visually lengthens the distance between two opposite edges. By simply installing slats along a short wall, you can visually alter the proportions.
 Diagonally spaced planks visually expand the room. In this case, it is necessary to achieve a certain ratio between the width of the element and the direction. Too narrow products crush the ceiling surface and are more suitable for a spacious kitchen. Wide, especially with narrow shiny inserts, visually increase the area of the ceiling.
Reiki can also be laid in a more complex way - in the form of a geometric figure, imitation of parquet laying and so on. Such a solution is more difficult to implement: you will need to develop a framework for each fragment of laying.
- Color is selected primarily by style. If there are shiny elements in the design of the kitchen unit or decoration, you should use this color when choosing rails or inserts. If the style does not welcome such a solution (for example, rustic or techno), then select the mat with a matte finish and a neutral shade.
- Gloss depends on the degree of grinding. The matte finish is inherent in aluminum. Very often it is used in this original form. A shiny surface is more common in steel, and when painted “under the metal” - gold, bronze. "Mirror" rails have the maximum ability to visually increase space.
- Design. There is nothing easier than creating a two- or three-level ceiling using rails. Moreover, the shape and height of the figures of the second or third level can be absolutely any. The most incredible models in the style of Art Nouveau, Futurism or high-tech can be realized. When installing ceilings in the kitchen, photos of rack systems in themselves serve as a source of inspiration.
 In addition, in large rooms - whether it is a combined kitchen-dining room or studio apartment, you can implement volumetric solutions - a wave, a dome.
Slatted ceiling system - a very interesting and practical solution for the kitchen. And besides, it is far not as expensive as it seems: in most cases, the design costs less than a stretch web.